Article updated: September 2019
Contents
Welcome to our guide on carp rigs for beginners!
Over the years, there have been many carp rigs. I’m sure they’ve all caught carp, and many anglers will stick to their tried and tested rigs, which is just fine.
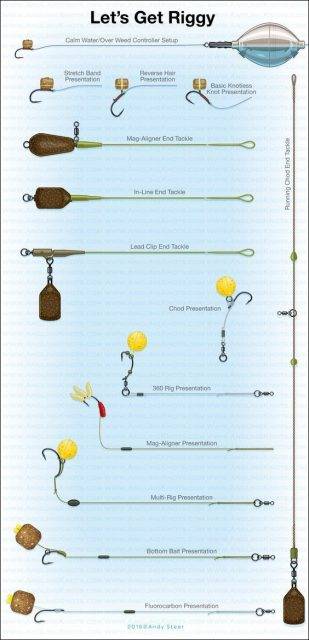
Take a look at some example carp rig diagrams to get a feel of what makes up a rig.
However, the modern carp angler should be able to at least make, and tie, a handful of well known carp rigs.
Most seasoned carp fishermen develop the ability to read angling situations, like learning about the terrain, hoe to find features and locating carp, so learning a good variety of carp rigs will give you the best chance of hooking a beauty!
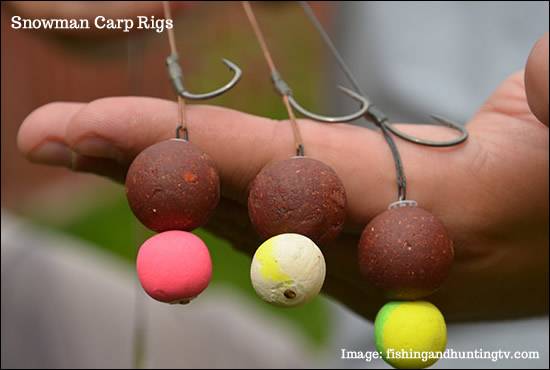
My Dad, for instance, still uses the Snowman rig which is highly effective, even today!
An important first step is by learning the rig basics, like tieing secure knots, the right lead selection (sizes and shapes) and keeping everything pinned down and safe.
What’s a Carp Rig?
A carp rig is what you attach to the end of your line.
This usually compromise of a hook, your chosen bait, and some kind of weight to pin it all to the lakebed.
What you’re ultimately trying to do is present your hook bait the best you can to maximise your chances of hooking a carp.
Before you jump in, our advice to beginners would be too keep it simple!
The Hair Rig
Knowing how to create a basic hair rig is a perfect staring point for beginners.
Rather than placing bait directly onto a hook, the hair rig was designed to detach the bait from the hook – making it easier to hook carp, and was first used in the 1970’s.
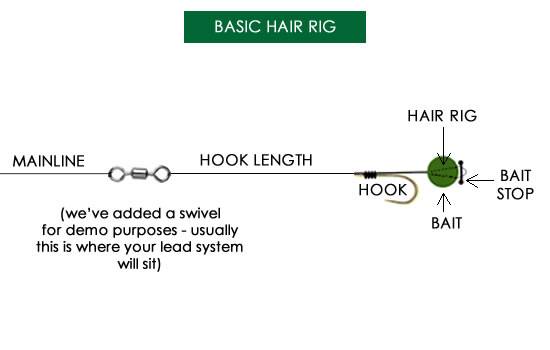
As you can see from the awful graphic above, we’ve substituted a swivel in place of a lead system.
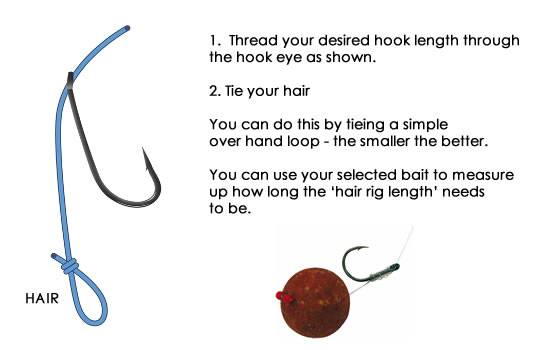
This is a very basic hair rig – you can see the bait is seperated from the hook, and this is called the ‘hair loop’.
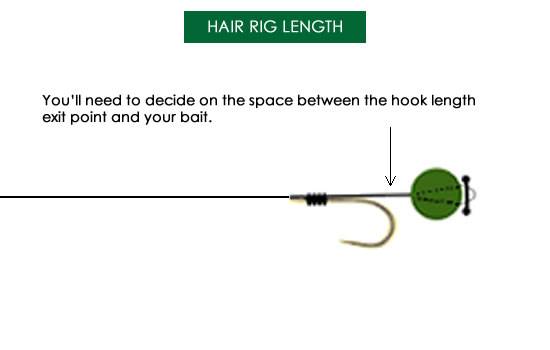
Deciding how long this should be depends on the bait you use (too short and it won’t thread through your bait).
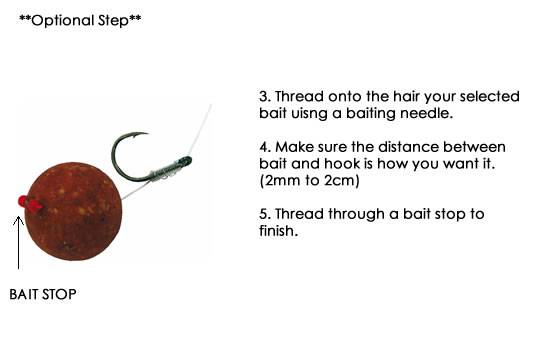
The space between the hook and bait can be anything you like. Any carp rig that you are learning to put together will usually tell you what length mind!
Basic Knots for Carp Fishing
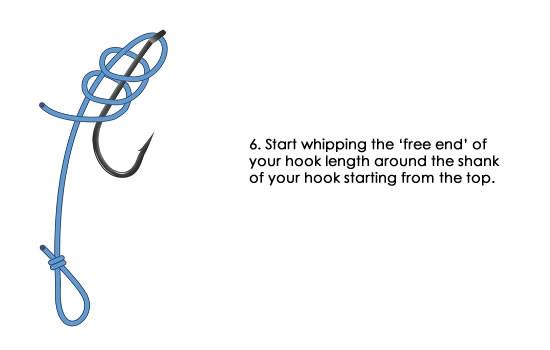
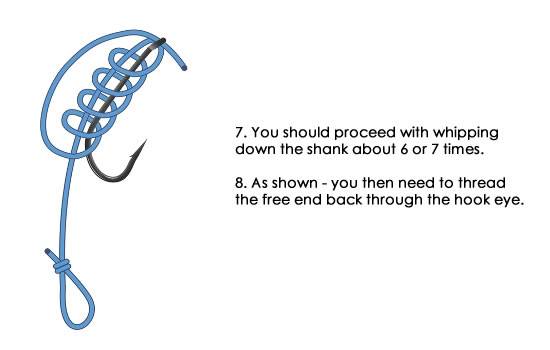
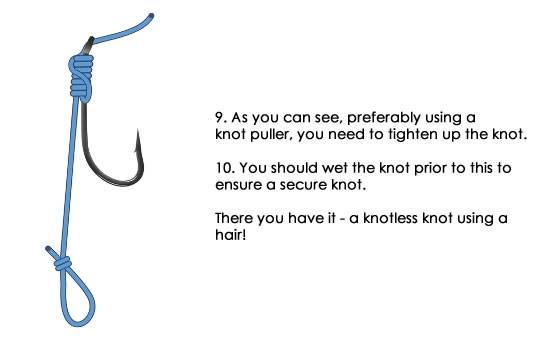
As you can see with the hair rig above – we’ve used what is called a ‘knotless knot’ to attach the hook.
This is a very tidy knot, and easy to master – we promise!
These instructions below will teach you how to create a basic hair rig – using the knotless knot.
Just a tip for that extra security is to moisten every knot before tightening!
This steel knot puller is ideal to tighten everything up.
For those that may prefer a video, this perfectly demonstrates a knotless knot.
Once you’ve nailed how to make a hair rig, you can begin to think about other elements of your carp rig.
Deciding what Lead System to use
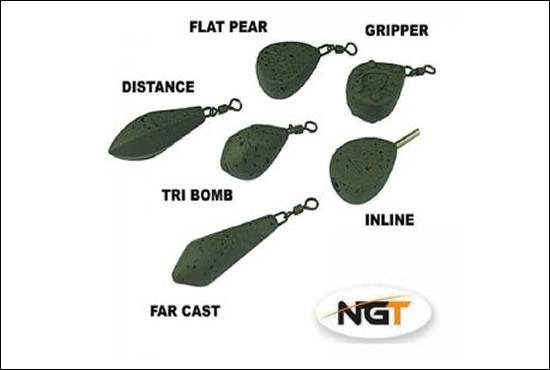
The most common lead systems used in carp fishing is either a fixed, or running lead setup.
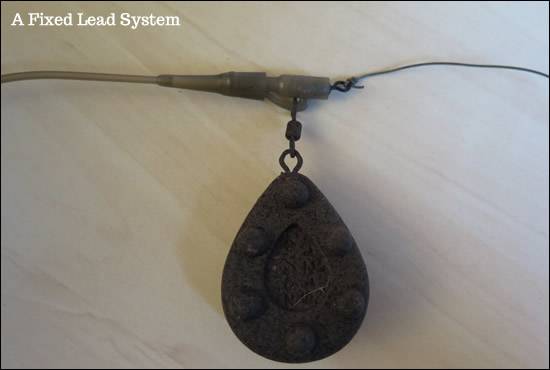
A fixed system utilises a lead clip, illustrated below.
You could use an inline lead that is also fixed, or semi-fixed.
No products found.
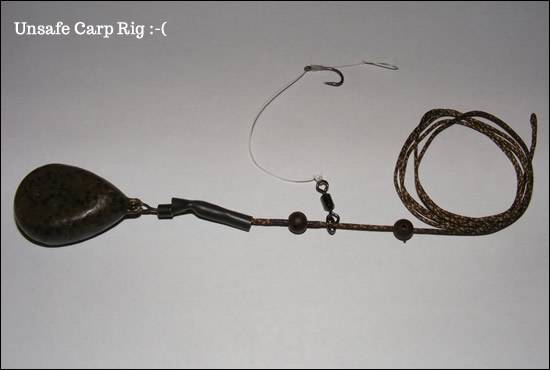
The fixed lead system can be made safe by using a lead clip system, (the part you attach your lead to) which is gently held on with a tail rubber.
If the fish does get snagged up – the lead ‘drops off’ and the carp won’t be dragging it around the lake (a big no-no!)
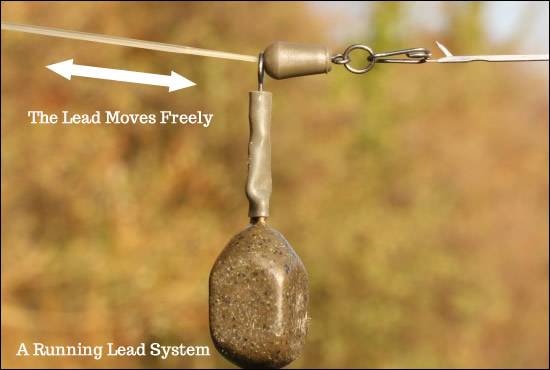
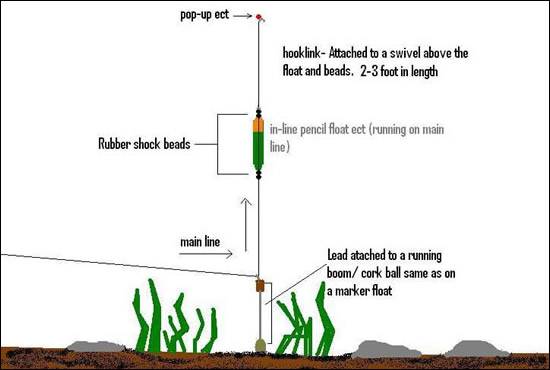
A running lead rig, like the one below, allows the end to move freely between two points.
You can use buffer stops to set these.
Again, if you lose a carp due to a line snap – the lead can ‘drop-off’ safely.
Just don’t run your lead over line that won’t break very easily (certainly don’t use leadcore!)
Both lead set-ups offer varying benefits.
Again, think about the lay of the lake bed and the time of year which may affect which one is more suitable.
For example, using an inline ‘fixed’ lead when fishing over a hard bottom – such as gravel, gives the hooklength more weight during a bite and really sets the hook.
During the colder months when carp tend to move around slowly, a running rig gives a more ‘sensitive’ bite indication.
Use a running rig on more softer lake bottoms as opposed to a fixed, heavier lead, otherwise the lead could bury down deep into the lake bed which gives the carp leverage to unhook itself!
Maybe you’re interested in making your own carp leads?
We’ve created some instructions on how to do this in our guide on ‘Learning How To Make Your Own Carp Leads at Home‘
The length of your hooklink and the material to use
Water clarity, depth, and terrain should be thought about when choosing the type of hook length to use.
The three main materials used in carp rigs are braid, fluorocarbon and mono – all of which have their own unique styles and behaviours.
Today, mono is less frequently used due to the better properties of braid and fluorocarbon, which you can see in the table below.
| Braid | Fluorocarbon |
| Wide range of colours Variety of stiffness/suppleness Covers a more variety of rigs | Very Dense Fast Sinking Ideal for use in clear water Same light refraction properties as water |
Each material has its own strengths and weaknesses.
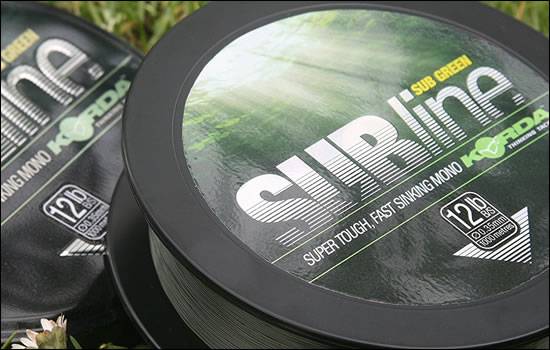
Monofilament is a single strand of nylon and commonly called ‘mono’ – as mentioned, isn’t used as much as these days.
(check out some great monoline such as Shimano’s Aero or Korda’s Subline)
It is cheap, common and has good knot strength as well as low visibility and a good colour retention. It does absorb water easily which effectively increases its stretch and exposure to UV light.
As for Fluorocarbon – it can be bought in varying strengths and thickness.
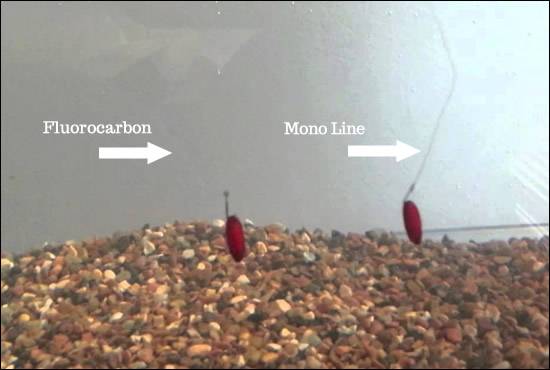
It carries very low visibility, is denser than water making it sink quickly and does not absorb any water either.
It’s more expensive than mono, can be used for a wide range of knots and is a lot stiffer which suits certain rigs. It’s roughly twice the price of mono.
Much loved by anglers as a leader material due to its sinkability and disguise.
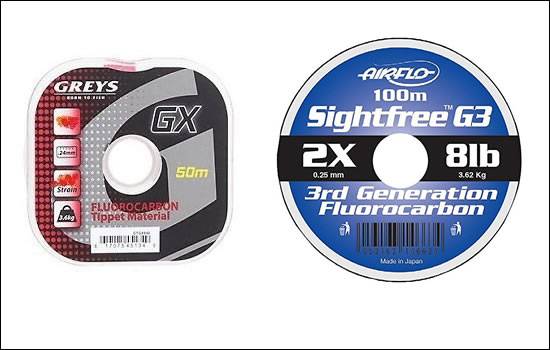
If you fancy giving fluorocarbon a try, we highly recommend Airflo Sightfree or Grey’s GX.
We’d say that Fluorocarbon is without doubt the best hooklength to use if the lake is very clear.
This is due to similar light refraction properties as water, thus almost completely ‘hiding’ your hooklength from wary carp.
Another great thing about fluorocarbon is that it sinks to the bottom very fast – so you can be sure your rig is ‘pinned down’ with confidence.
Next up is Braid (sometimes called microfilament) which is made up of strands of polyethylene that are fused together.
There is no stretch, it doesn’t absorb water and is more supple than mono or fluoro. In its common form, it’s susceptible to abrasion and colour fading so coated braid can be bought to combat this.
It does let itself down when it comes to tying knots (only certain ones can be used such as a Palomar knot).
It is also a highly visible material and tangles can occur more frequently as well.
Available for about the same price as fluoro, braid shines through when it comes to distance casting and strike detection especially with a high strength braided line.
When choosing a Braid, there are various options including colour, stiffness, suppleness and strength.
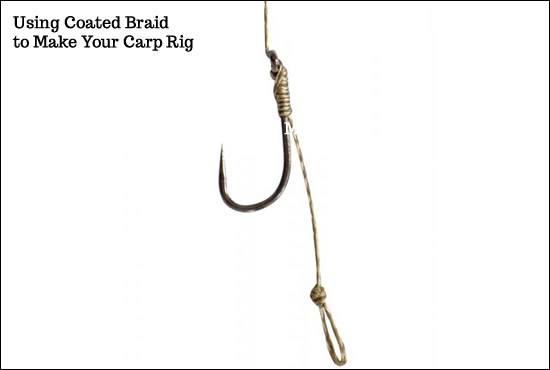
Coated braid allows you ‘peel’ back the outer nylon to reveal a supple material that is most often used to allow the hook to turn freely and be used in a pop-up rig.
So, there you have 3 very different hook length materials to choose from, all are very useful depeding on what situation you’re face with!
Choosing hook size and pattern
Carp hooks have really improved over the years!
Today, you’ll find carp hooks are made from high quality materials, have much improved sharpness and are ultra strong.
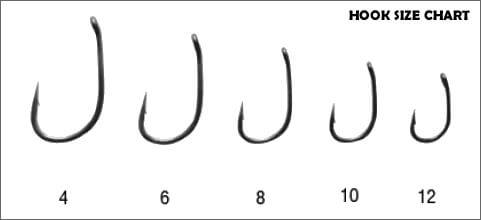
Let’s begin with the most common hook sizes.
There are 5 sizes (well, the most common anyway!) and sizes 4, 6 and 8 are used for most carp rigs because they are strong enough to cope with the demands of a carp.
Sizes 10 and 12 are suited to zig rigs, or surface fishing (where the need to delicately hide your hook is neceessary!)
These smaller hooks also tend to be lighter and gape size is narrowed (how open the curve of the hook to the shank is)
Matching the hook size to bait size could be key during a session (just experiment really) but remember the bigger the hook – the harder to disguise a bait!
Then there is keeping your hooks sharp!
Although most are exceptionally sharp, you could save money by investing a quality hook sharpening kit.
Each time you take a hook from its packet, place the hook slightly over your finger nail. It should stick in straight away and not drag along it.
Now you know if you’ve a sharp hook or not!
Hook Patterns
Hook patterns have also really evolved.
This is because some rigs require a wider ‘gape’ or a longer shank to work properly – and hook manufactuer’s have adapted to this.
Here is useful list of the carp hook patterns used today, together with the reasons for using them.
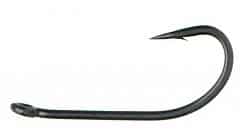
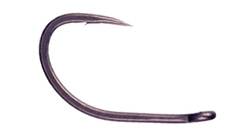
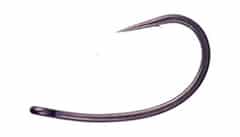
| Inward Facing Eye | Very common due to ease of its turn when a carp is hooked. We recommend rig that uses a knotless knot and braid for this hook. |
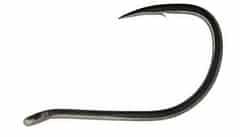
| Upward Facing Eye | Ideal for a stiff rig presentation as the hook will remain straight. |
| Straight Hook | Not used much but great for on the top fishing. |
| Shank Hooks | Turn very easily meaning they are effective at hooking carp. Ideal for big, wary carp. |
Other Carp Rig Elements
We’ve covered the hair rig, lead systems, hook length materials and hooks – now we move on to other carp rig elements and tools that are just as important!
Swivels
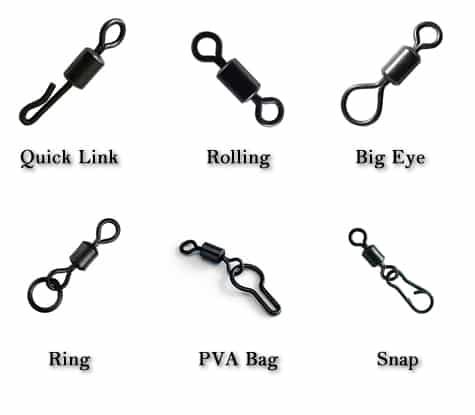
Swivels are mainly used for attaching mainline to your hook length, or used for heli or chod rigs for example.
Micro ring swivels can be used to slide onto your hook if using a 360 rig (your bait is able to turn all the way around your hook) Using a size 8 swivel is common
Typical types include rolling, micro, quick link, flexi ring or big eyed swivel.
Your swivels need to be reliable as your last connection to the carp!
Baiting Needle
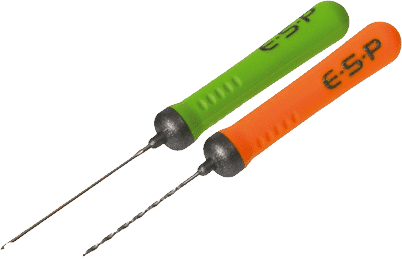
A baiting needle is used to thread your bait onto a hair rig – a very useful tool to have!
Some anglers are happy to use a needle for everything, others may prefer varying sizes or hook differentials.
You may want to use a latching needle for boilies or particles, or a finer needle maybe be better for softer baits such as pellets, sweetcorn or even splicing.
If you require your line to be threaded through harder material such as wood or stringers – a heavy latch needle is stronger and preferable for the task in hand.
For really technical tasks such as making hair rigs from braid, you could buy a braided hair needle which is specific for this to avoid tangling in the braid fibres, look onestop plumbers.
Leadcore should be spliced with the strongest needle you can find!
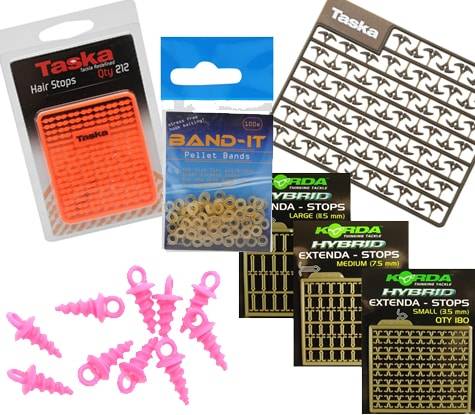
Bait Stops
The final piece of the jigsaw, a bait stop is used to keep your bait secured properly.
You can buy various shapes, colours and sizes – but your choice depends on the bait used.
Find a size that fits snug against the bait.
Varieties of bait stops includes boilie screws, extend stops, boilie stops, pellet bands, maggot clips and hair stops.
One Final Carp Rig Checklist!
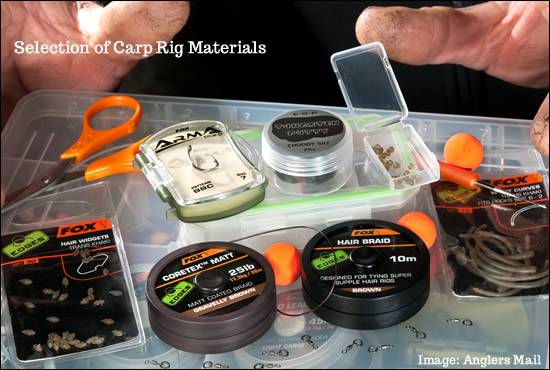
There are many other bits and pieces you can use in a carp rig.
When you’re learning a rig for the first time, find out what components are used first!
These may include:
- Anti-tangle sleeves – used to keep your rig tangle free. Placed onto the swivel that connects your lead system to your hook length.
- O rings – used as part of the hair rig section
- Swivels – to connect line together
- Shrink Tube – placed around the eye of the hook to improve the gape
- Bait Floss – used to attached bait
- Putty – used to weight down sections of line or as part of a critically balanced bait
- Sinkers – again, for weight purposes
- Kwik Links – easy alternative to the swivel allowing a quick change of rig
You may need to use steam from a carpy kettle to straighten out some parts of a rig.
Zig or Surface Fishing
An exception to some of the methods mentioned would be surface fishing where all you need is a hook and bait directly attached to your mainline that you cast out onto the surface.
You may or may not of heard of zig rigs which is an alternative method where you fish a rig throughout any layers (various depths) of a lake.
We’ve put together ‘The Perfect Zig Rig Set-up‘ for those interested in this fun method of carp angling!
This method is excellent in the warmer months when carp cruise near the surface.
Adapting Your Carp Rigs to Situations
If you’re comfortable with making basic carp rigs and now want to adapt these, we’ve put together what goes into our thought process of what carp rig to use in any given situation.
These are just some of the things you may want to consider, and may specifically help beginners to carp angling!
Lake Features – Are you fishing in (mainly) open water? Any weedy areas or reeds? Don’t neglect margins & gravel bars which can be great areas to target.
Locating Carp – Carp like to patrol certain features or hold up in safe areas. Find these, and you’re onto a winner!
Use all the water in front of you! – Depending on the time of day, wind conditions and seasons, Carp like to move up and down the water column.
Angler pressure – too many lines in the water make for shy and wary carp!
Riggy – by this we mean carp could be ‘switched on’ to certain rigs. Learning some local knowledge could help you here.
Feeding Times – Carp feed at varying times throughout the day (commonly at dawn and dusk).
Weather conditions – wind, rain, temperature and air pressure (It’s worth reading about water oxygen levels also!)
Session length – (think baiting campaigns and long term strategie folks)
Locating Carp in Winter
When choosing a carp rig, understanding and adapting to these conditions could make the difference between a good session and drawing a blank.
Rig Rules
Lakes will have rules, but should be aware of some rig guidelines that carp anglers should be following.
Rig safety – make your carp rig as safe as possible to avoid harming our carp. Drop the lead in weedy areas!
Try to achieve the best bait presentation possible. Test them out in the lake edge or at home by dipping them into a bucket of water so you analyse how they behave.
Think about hook hold – aim for the centre of the bottom lip. You can test how a hook will hold by dragging the rig across the palm of your hand.
Experiment! Learn how your rig works – and try to improve it where you can.
That conlcudes everything there is to get you started on making your very own carp rigs for beginners.
Please visit our ever expanding ‘Carp Rig Guide‘ where you can follow along to some great carp rig making videos.

Mike has over 30 years of fishing experience in carp fishing and general coarse fishing. He is always looking for the latest fishing kit to try out and talk about and needs a bigger shed due to all the fishing tackle he owns. You can read more about him here.


